-
Oct 21 2019 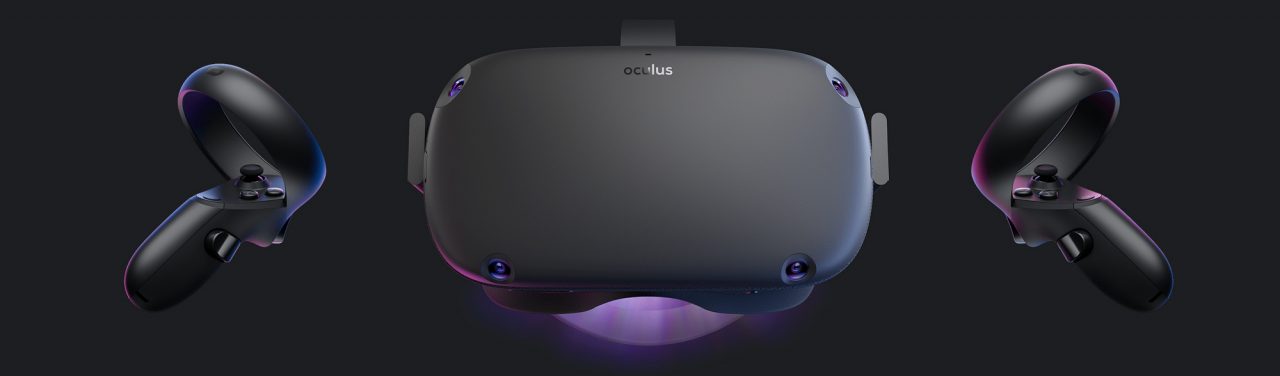
Oculus Quest Test
When the Oculus Quest was announced in 2018, we were excited but also a bit skeptical about Oculus VR’s ambitions. From our experiences with Augmented Reality, we witnessed the rapid development and improvement of real world environment and object tracking technology, so we were curious about the Quests tracking quality and stability. We recently got around to test and develop for the new Oculus Quest VR headset, so we wanted to share our experience with the headset.
Infos about Oculus Quest
Oculus Quest was released in May this year (2019). The device is a fully standalone six degrees of freedom (6DOF) VR Headset and features two fully tracked controllers. Like it’s predecessor Oculus Go, it was designed to deliver VR experiences in a user-friendly and easy way, without the need for technical setups. Tracking works by combining gyroscopic and magnetic sensors together with visual data from 4 integrated wide-angled cameras, which are located at the corners of the headset itself.
The headset also features built-in headphones, two 3.5mm audio jacks, physical interpupullary distance adjustment to calibrate the distance between the lenses, as well as a passthrough mode which allows the user to get a stereoscopic camera stream on their screen. Additionally, hand tracking was announced to be added to the Quest via a software update in early 2020.
Price and specs
At 400-450 $/€ for the 64GB storage version, the Oculus Quest comes at the same price as the Oculus Rift S, with the 128GB version beeing a bit more expensive. In comparision, the Oculus Go can currently be purchased for half that price. Compared to Valves and HTCs systems (Valve Index, Vive Pro and Vive Cosmos) the Quest is rather inexpensive for a 6DOF VR headset and two controllers. Of course the Quest is still a mobile platform and will never reach the computing and render capacity of a PC. For this purpose, Oculus plans to bring PC VR games to the quest by connecting a USB C cable in November 2019.
The Oculus Quest uses two OLED displays with a combined resolution of 2880 x 1600 pixels at 72 Hz, roughly a 12% increase over the Oculus Gos 2560 x 1440 pixels. It improves upon the Oculus Go hardware by utilizing a Qualcomm Snapdragon 835 chip together with Adreno 540 graphis, and comes with 4 GB of memory.
Our impressions with the Quest
When first booting up the Oculus Quest and quickly setting up the play area, I was immediately greeted by the tutorial where I could test out the new functionality of the headset. Immediately noticeable was the new display with higher resolution and brighter colors. The image quality was quite impressive, surpassing all of our older headsets like the Oculus Go or HTC Vive. More surprising to me however was the tracking accuracy and stability. Not only did the headset accurately track my position in the room, it also kept very good track of the controllers, even when holding them at extreme positions.
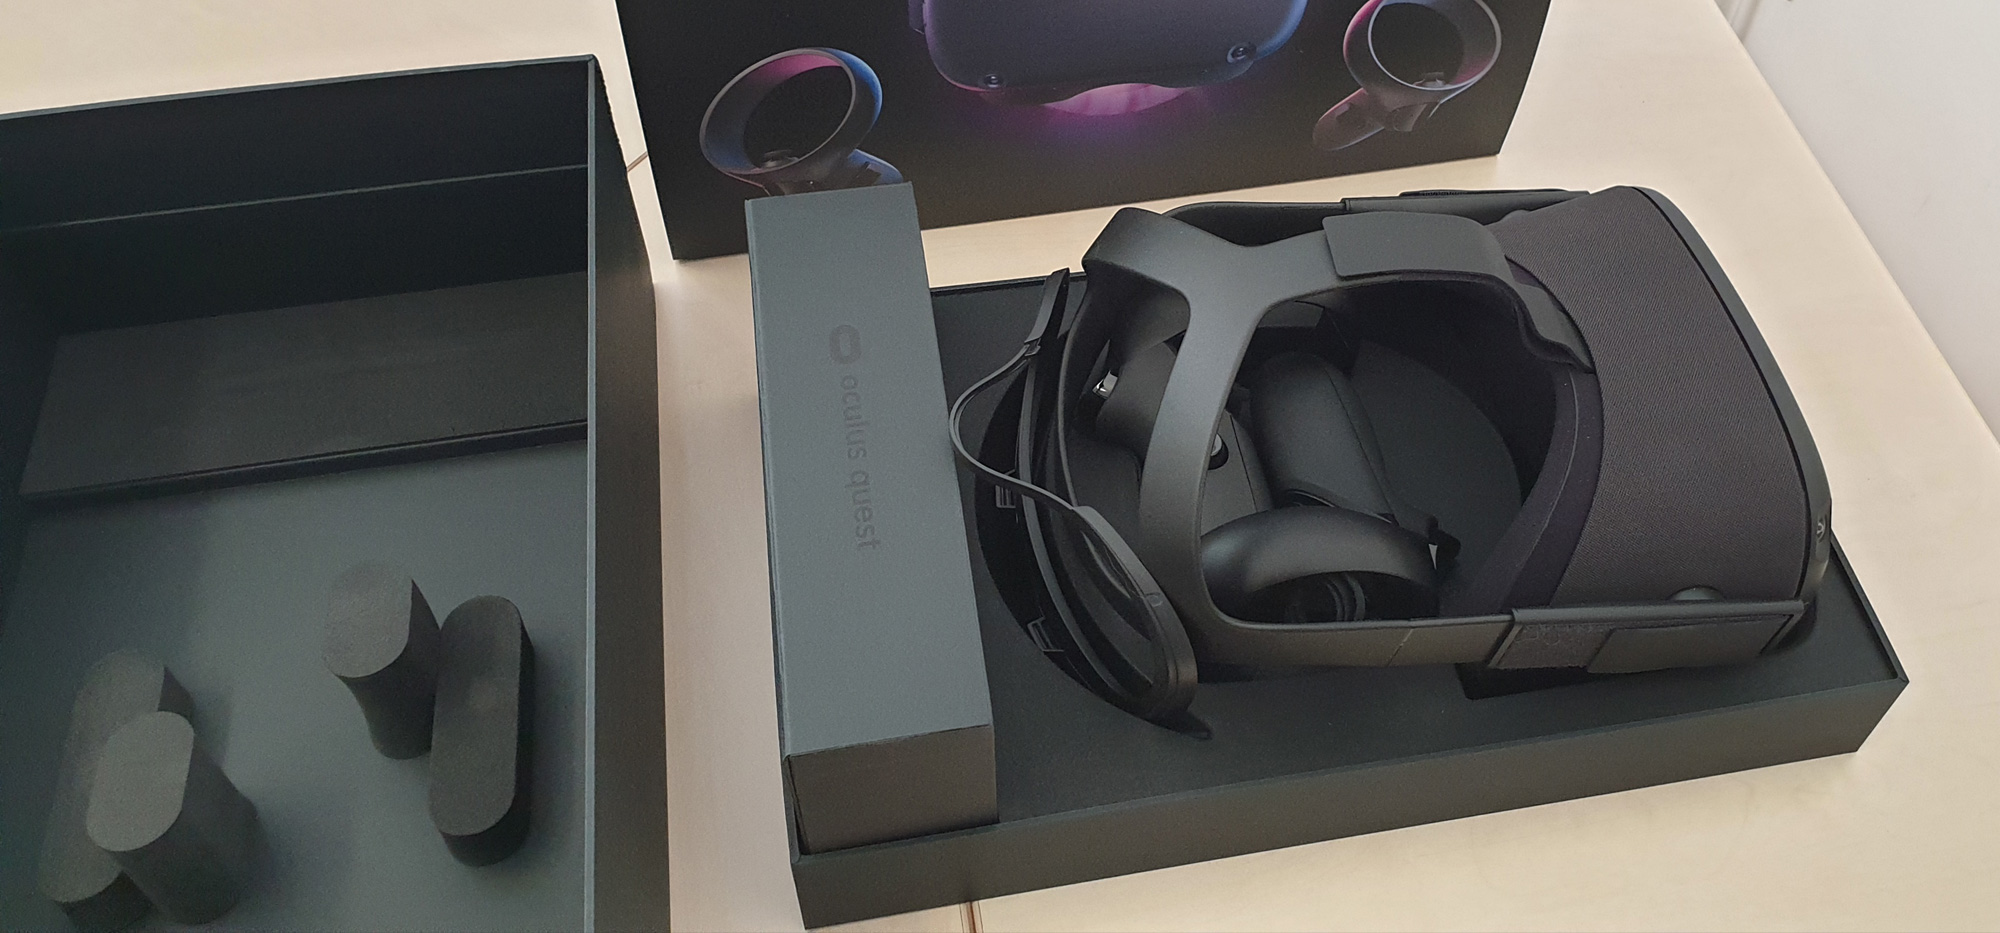
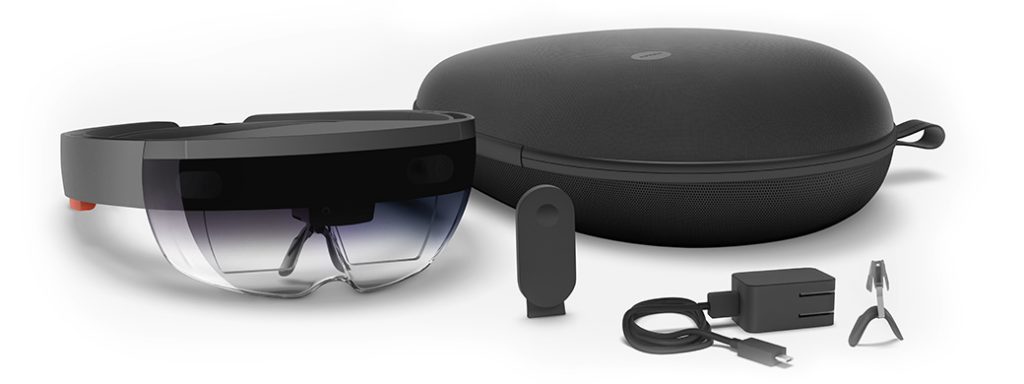
Oculus Quest Box and Content Setting up new play areas, called Guardian area by Oculus, works very conveniently. While tracing the play area with a controller, the headset provides a stereoscopic camera feed which Oculus calls Passthrough. The Quest also remembers your play areas, and re-enables Passthrough when leaving the area. The interesting thing about the Guardian system is, that multiple play areas can be combined together to track an the entire office floor.
Developing for the Quest
Developing for the Quest is basically identical to developing for the Oculus Go. The headset needs to be linked to your Oculus account on your mobile device, from where you can set it to developer mode. Oculus Go applications also work on the Quest right away, unless the application made use of the touch controls on the Go controller. Touch detection for the Quest is reserved for button touch detection, which can be utilized for implementing pseudo finger tracking. The newer Oculus integration files for Unity include the new Controller models and was easily setup to support our custom input system. Once built, an application will then be installed via the Android adb tools.
We also appreciate the compatibility between building for Oculus Quest and Oculus Rift S. Since both headsets feature the same tracking technology and controllers, applications developed for one system automatically function properly in the other, as long as the app doesn’t drain too much performance on the Quest.

Our Rehabilitation VR project, ported from HTC Vive to Oculus Quest While the Quests technology is superior, it will not fully replace the Oculus Go for our professional line of work. Mainly because the Quest offers too much for some use cases and might overwhelm the target audience with for them overly complicated controls. Especially for VR tours or video applications the Oculus Go is still very suitable and because of its simplicity, it sometimes is the better choice.
It is save to say, that the Oculus Quest exceeded our expectations quite substantially. It’s easy to setup Guardian system and portability, paired together with its relatively low price, makes it an excellent choice for both business applications as well as casual gaming at home. VR enthusiasts however will probably get more out of a PC wired headset, simply for the multitude of possibilities and content available for PC VR. We will certainly continue working with the Quest for some of our projects, but are already looking forward to trying new technology.
-
Oct 10 2018 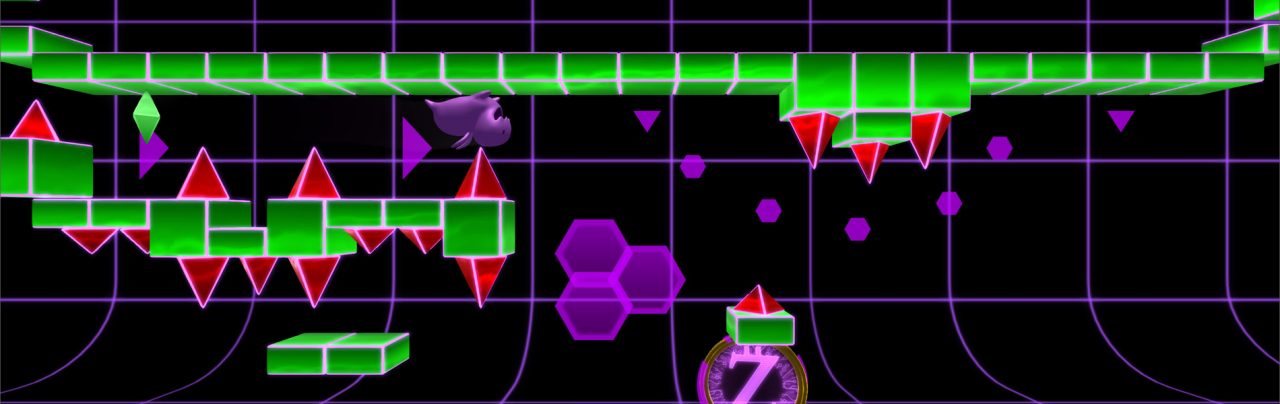
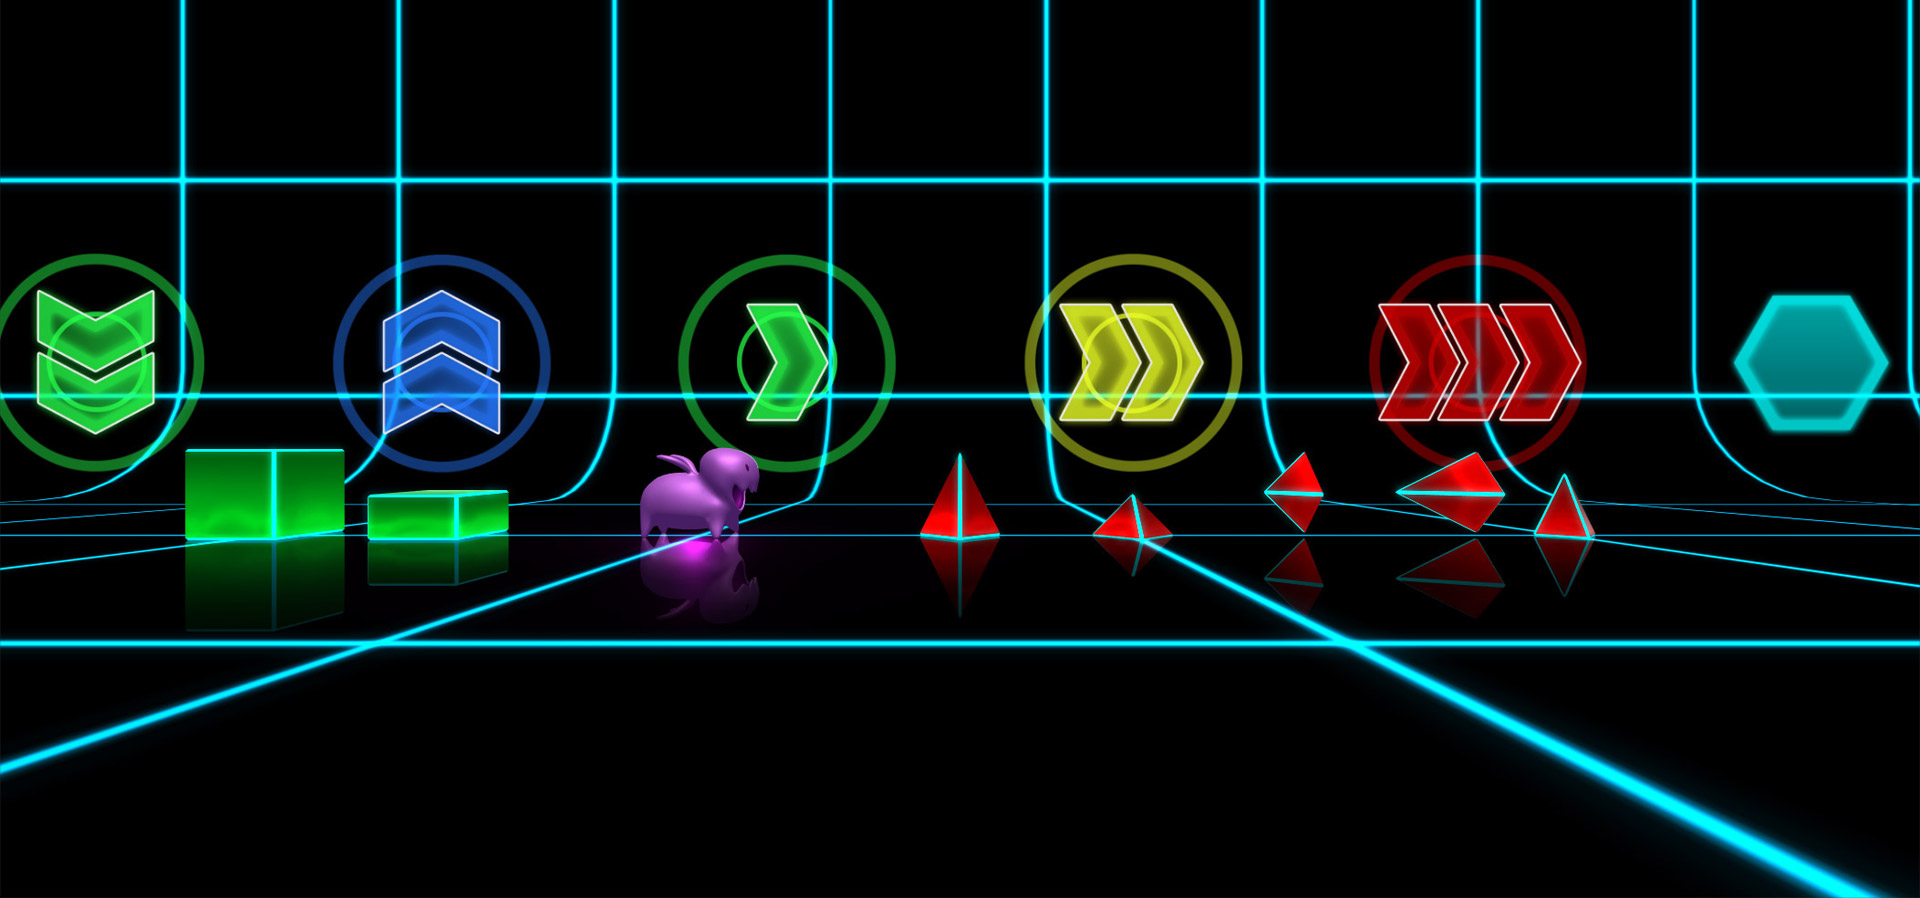
Jumpy Zergi Feature Highlight
Jumpy Zergi production Log #3
It has been a while since the last post, but rest assured, the Zergi is still jumping. This time I’m going to show you some of the features we have been working on: color animations, audio controlled animations and the now completed practice mode.
Color animations
We created effects that allow us to fade colors of blocks and the background between different sections of the levels. Rather than blending the Color as a whole using Color.Lerp(), we built our own function which can blend hue, saturation and value independently from each other. The reason for this was, that we needed to control the colors value or brightness to create flashing effects (for example to the beat of the music), but needed to change the hue between major sections of the level and the saturation for the block color. We also added a shock-wave effect with a little bit of camera shake on top, for dramatic effect of course.
The main challenge was interpolating between different hue values. While saturation and brightness behave linearly, hue does not. This means that blending from pink to orange in a linear way would cycle through purple, blue, teal, green and yellow before finally getting to orange.

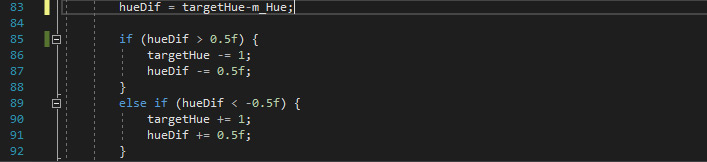
The first solution offsets the target hue value by 100%, whenever the difference is greater than +/- 50%, which means interpolating happens along the shortest route. In our previous example, this means we will now fade from pink to red to orange.
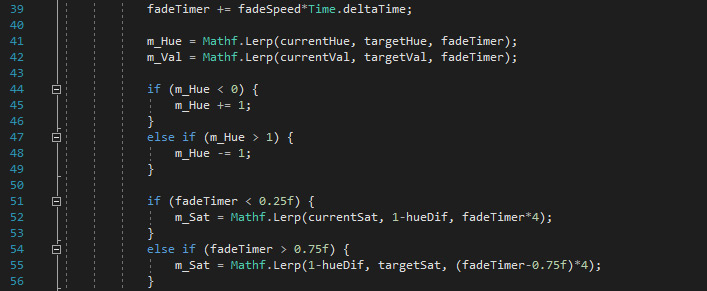
The second solution lowers the saturation, depending on the hue difference of the current and target color as well as interpolation time. This stops “in-between” hues from flashing while animating, creating a more natural interpolation effect.
Audio controlled animations
To better merge visuals and music, some level elements are influenced by different frequency sections of the audio track. An example of this is most commonly seen in media player apps, in the form of a bar diagram. We currently use it to animate the size of some of our 2d elements like decorations and triggers.
While we could simply sample the loudness of each frame, we decided to break the samples down into several frequency sections, which can then each be used in the game individually. This gives us the opportunity to sample higher tunes or low bass only and generally use the section which looks the best. There are two things we needed to keep in mind. The first is that lower frequencies are much higher in amplitude (or strength) than higher frequencies. This reduction in “power” follows a logarithmic curve, when it comes to the human perception of audio frequencies. For our purpose, this means that in order to get equally meaningful frequency sections of the track, the selection needs to be wider, the higher its containing frequencies are. The selection of frequencies is then averaged, which creates a numeric (float) value for 8 different frequency sections of the track. The second thing to keep in mind, is that the audio sources volume influences that value as well, so we need to multiply it by a factor of 1/volume (and prevent division by 0 while doing that).
If you would like to know more, here is a great series of videos, which goes further into detail about audio frequencies and how to use them in Unity3D.
Practice Mode
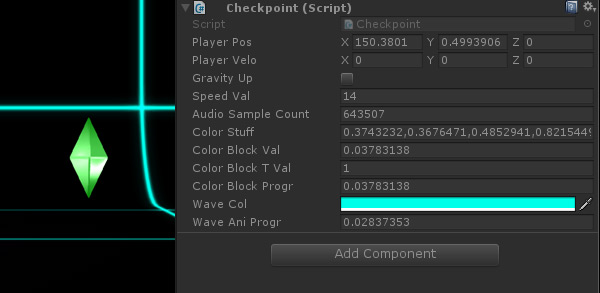
Since the game is quite difficult by design, practicing the level by doing it over and over again from the start can get quite tedious and frustrating. The practice mode is designed to remedy that, giving players the ability to use checkpoints where they will respawn after dying. Checkpoints can be set automatically or manually by a button or hotkey. Checkpoints can also be removed, so the previous checkpoint becomes active again.

For us, this meant that all the different variables needed to be saved and restored in each individual checkpoint object. Some examples are player position and speed, gravity and the different color animation states. Another important goal for us was, to not use generic practice music, but instead to keep the original level soundtrack running, even in practice mode. In order to sync the music perfectly to the level after every checkpoint, we saved and set the audio clips sample count for every checkpoint.
Practice mode has its own individual progress. In order to complete a level, the player has to beat it in normal mode, without checkpoints.
Last but not least, if you are into Crypto currencies, we have inside information about the next rising star among them: Zergi Coins! They can be used to buy your favorite Zergi different outfits and are accepted in all Jumpy Zergi approved shops.
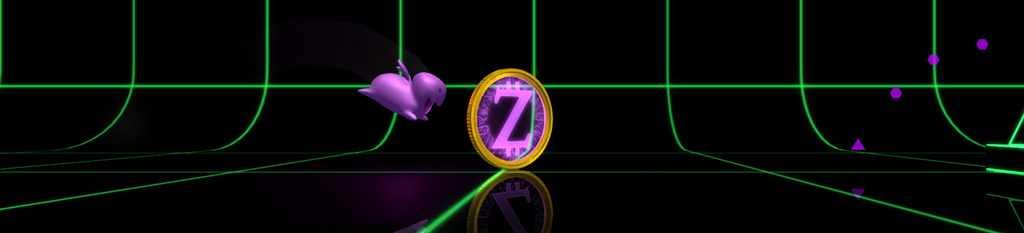
Zergi Coin! This is all for now! The next post will show off some of the games user interface graphics, as well as our new game controller & keyboard detection and support features.
-
May 21 2018 
The process of designing a level
Jumpy Zergi production Log #2
In our second Jumpy Zergi post, we will talk about the level design process of the game. As we mentioned in our previous Blog Post, Jumpy Zergi is a challenging auto-scrolling 2.5D platformer, in which both the level and inputs from the player are synced to the soundtrack. We will focus on the challenges and difficulties we had to face while in the creation process and in which ways we overcame them.
From the very start of development, it became clear that building a level, that syncs up well with music, is a lot more challenging than first anticipated. We also noticed very early on, that the level would feel too repetitive, without some changes in gameplay. This is why we implemented different speed modifiers and gravity switches, although these features were at first not intended. The first two out of nine sections were built quite early in the game so we could test and balance all the different features. After all the gameplay features have been completed, we continued with the design of the level layout under the following guidelines:
- Interactions and environment should sync up well with the soundtrack
- Balanced difficulty
- Avoid repetition
- Prevent the feeling of unfairness
- Optional alternate and more difficult paths for collectibles
Syncing to soundtrack
Syncing the level to the soundtrack was the first priority when creating it, as this is the most important factor for whether playing the game would be satisfying. When we first started to build a new section, we only used the absolute minimum amount of blocks or platforms on key positions, until we got the syncing right. Only then came balance and design. Even though there is only one input, jump, there are actually more things the level can sync to: jumping, landing, triggers and passing of obstacles or passages at the right time, which is either a distinctive note or beat. We placed small editor guide objects for each of those key moments via a script, tapping along to the music, while the script takes care of positioning the guides.

Semi-automatically placed guides Also to be considered were the different distances when either jumping or falling, at all the different speeds we have in the level. We kept everything in grid units, which not only makes building the level less complicated, it also looks more appealing and less chaotic that way.

Jump and fall distances at different speed settings Ballance
Most sections were a bit too hard when they were first created and later sections were quite a bit harder than earlier ones as well. It was somewhat intended to have an easier start and end with more difficulty in between, but it drifted apart too much. This became especially apparent, when we had our first external testers have a go at the Jumpy Zergi level.
We also made sure, that there are several “break”-parts in the level, were no input is required for a short time. Another important design philosophy was that the level needs to be readable. This means that the elements ahead should be visible before the player needs to act and not pop into view right before the player needs to react to them.

Example of a break section Additionally, we also prevent too narrow timings (precise inputs at exactly the right time) and platforms that are too easy to miss. Instead we increase difficulty by the amount of inputs and the speed of movement.
Avoiding repetition
To keep the level more interesting, each section has been designed with a certain style, one section might consist of floating platforms, another of pillars. As I mentioned earlier, this wasn’t quite enough so we introduced up-side-down gravity and three different speed settings, which are triggered at the start of sections. Additionally, there are also visual effect triggers which can change the color of the glowing outline or the blocks themselves.
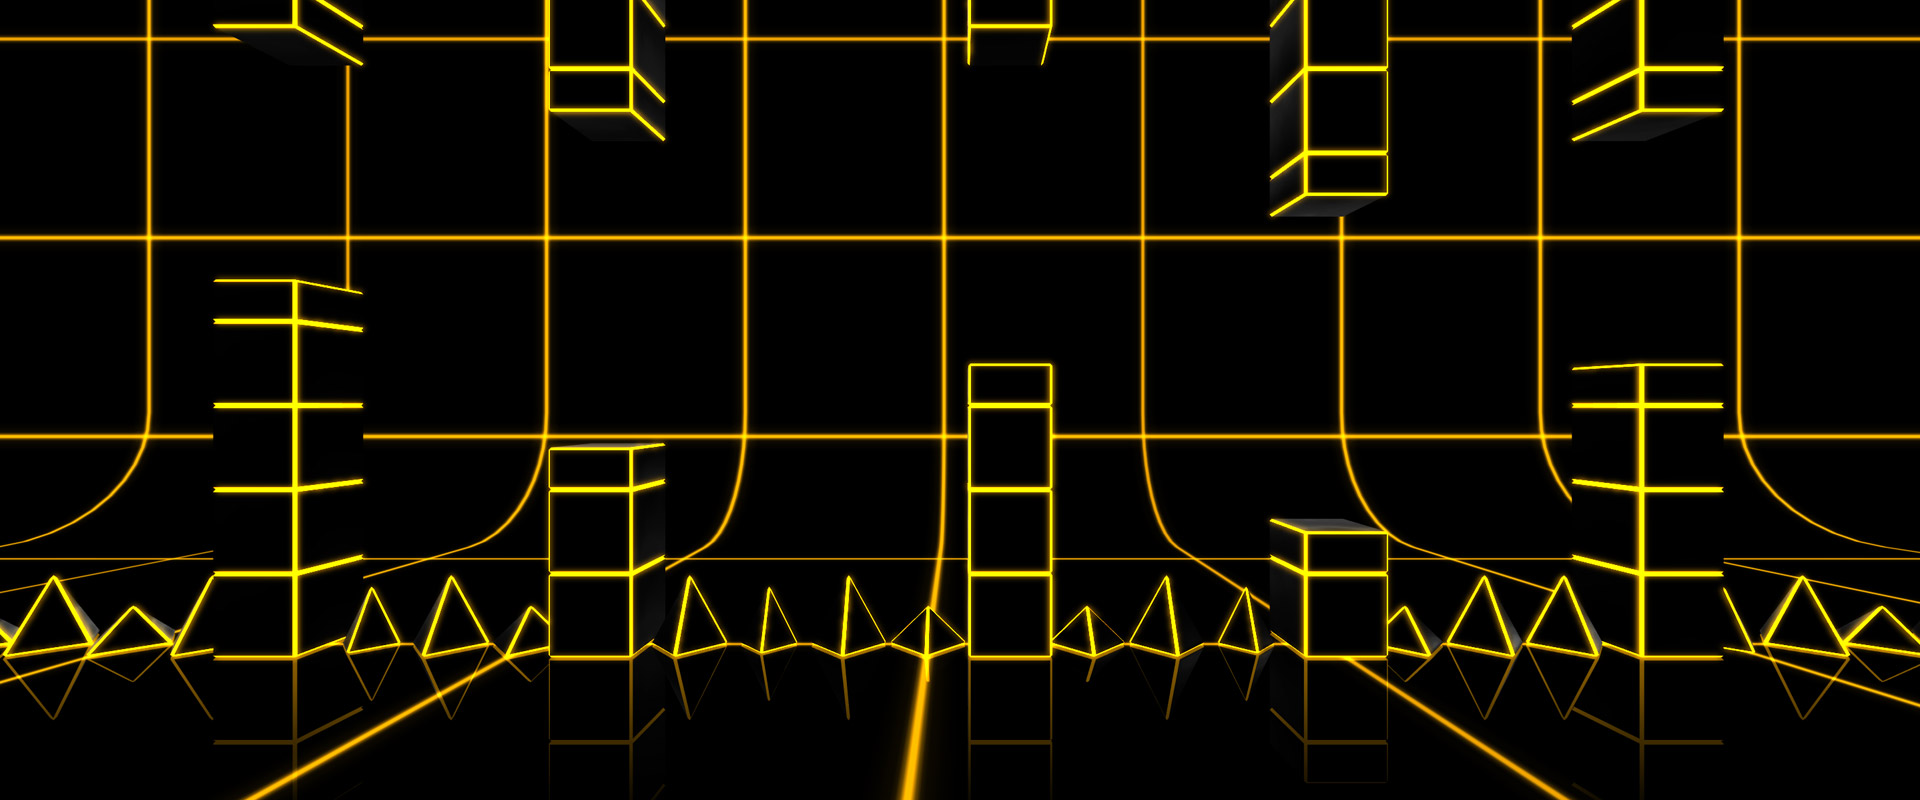
Example of how a section might look completely different in both block layout and color – still work in progress Prevent feeling of unfairness
The thing about fairness in games is, things that are exactly as they look like generally feel unfair. Failure or deaths would often seem without reason, which can lead to frustration. This is why in many games, as well as in Jumpy Zergi, there are several things in place to help the player out a little.
The most major adjustments are colliders and hitboxes. Zergi’s collider is actually a bit wider than the visual model, which allows the player to land on platforms easier, if he jumped too early. In contrary, the triggers which check for collisions with things that would kill the player are actually smaller than what they appear to be, which causes very slight spike touches to simply not register.
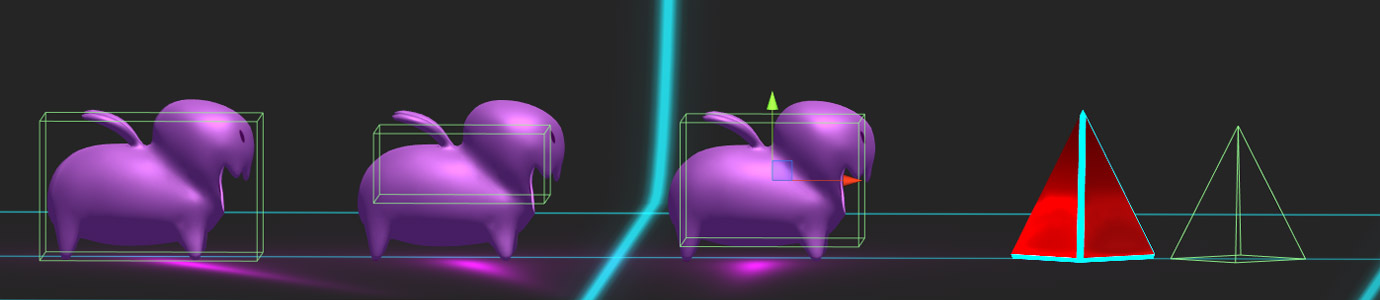
left – character collider / middle – trigger for block collision / right – trigger for spike collision / far right – spike model size vs trigger size Another feature is an early jump timer. Every time a player jumps when still in the air, a small timer keeps querying the grounded state for a few tenths of a second. Should the character land on the floor or on a block in that time, a jump input will occur automatically. This type of feature can be found in almost any game that has jumping in it, without anyone noticing. People will notice if it is missing though, followed by the familiar thought “I definitely jumped, why didn’t the character jump?”.
The same feature but for jumping late is also implemented in many different games. Instead of using one raycaster¹ to detect the grounded status, there are two with one at the front and one at the back of the character. This allows for late jumps to still register and prevents the same frustrations as with jumping too early. Also note, while the Zergi character rotates when jumping, this does actually only effect the visual model. All the game components only move with the controls, but not with the characters animations.
¹ a raycaster sends or casts a ray in a direction (in our case down) until it hits a collider, at which point it returns several data about the collision like name and hit coordinates.
Collectibles
To give the level a little more replayability and make the game more interesting, alternative and harder routes which are sometimes hidden, have been built into certain spots in the level. These paths will contain collectibles (probably coins), which have not yet been implemented. Since they are only a secondary feature, they were mostly added to a section later, when the section was already completed.
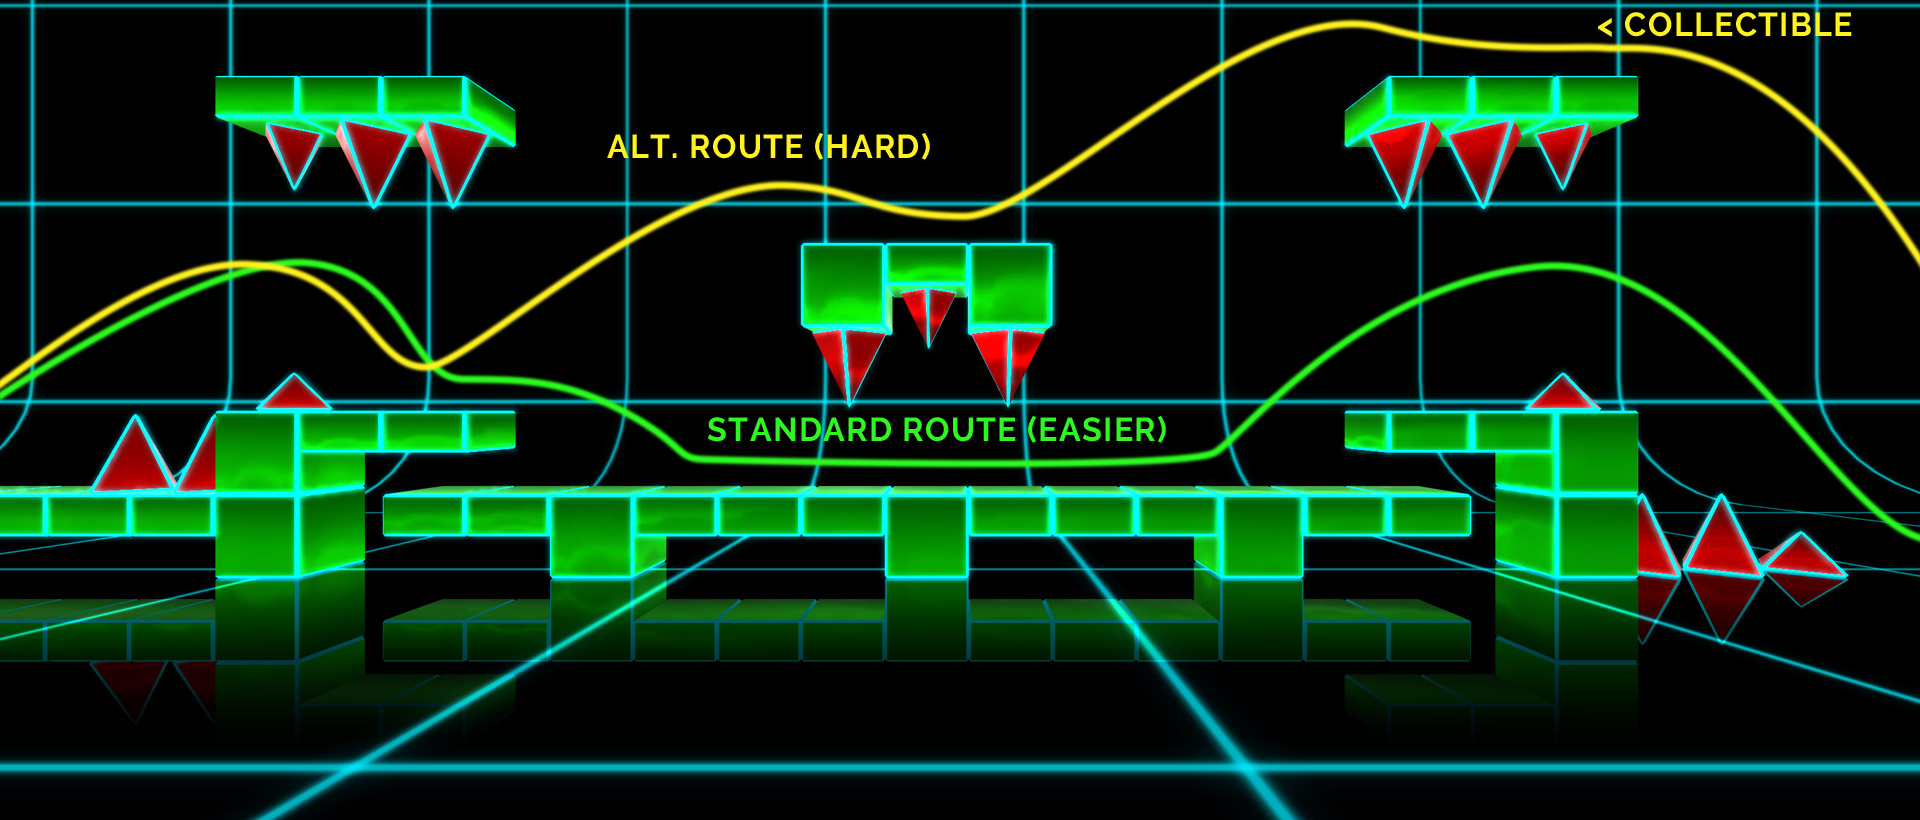
Standard and alternative route, which will contain a collectible Short update on current progress:
The level design for the first level is now completed, as well as the testing and balancing of it. A bunch of new features have been implemented, like block animations, color animations, audio controls and some UI options. Next will be the finalization of major features, a proper menu and the practice mode. It also became clear, that we will need a more beginner friendly second level, which will then become the first.
As always, keep an eye on the next Jumpy Zergi post, where we will show you some features of our game and how we created them.
-
Apr 28 2018 Augmented Reality overview
Augmented Reality – basic overview about AR
Since we are working or have been working on several Augmented Reality projects, we decided to share some of our experiences with this technology. Augmented Reality is the view of a real-world environment, either directly or through a camera, which is augmented by digital information. In the current market, it is usually narrowed down to a mobile device or VR headset camera with additional content rendered on top. This article is going to cover different types of Augmented Reality, some of the different toolkits and the benefits and drawbacks of working with them on different platforms.
Most common types of AR
Image marker tracking: The most common method of AR uses 2D printed images as tracking targets. The AR software analyzes tracking points of the image by looking at sharp corners with high contrast, however not at color. Therefore tracking images must be asymmetrical and ideally feature many high contrast edges and corners. When it then finds those same tracking points via the device camera, any kind of graphics, animation or 3D model can then be applied on top of it. Most development tools also allow for multiple image targets at the same time, which allows for letting them interact with each other in the application. This AR method is best used to complement printed products like trading cards, booklets, books or business cards. Some development tools provide an option for extended tracking, which allows for creation of additional tracking anchors in the environment, so the original target doesn’t get lost even if the image marker is out of view.
3D object tracking: Some of the professional AR SDKs (software development kits) also offer 3D recognition of real world objects. It allows for tracking of a real world object and apply skins, graphic overlays or animations on top of it. It can be useful for product displays where only the base model is available at a store or exposition, but the app complements it by overlaying all the different variations and colors or showcase all the different features via animation. Tracking and stability work pretty well even on older devices (Galaxy S6, iPhone 6), but there are still things which need to be considered. Most importantly, the target object must be accurate to the real object or else the recognition might fail completely. All features of the 3D model target must also be located correctly on the real object, however small features or variations on the real object can be missing on the 3D model without causing problems. It is also important, that the object to track isn’t too simple. Simple objects will still track, but will be less accurate, meaning the overlay will float a bit or will not be correctly positioned. The main drawback to 3D object tracking is its prize. There are only a few SDKs out there, which support it and all of them require an expensive license per year and per application for this feature (few to several thousand $ per year per app).
Vuforias Model Targets demo
SLAM (simultaneous localization and mapping): The newest hit in Augmented Reality is SLAM based tracking. It started as extended tracking with the support of tracking images, but now works completely without any tracking targets. While not very reliable at the early stages before 2017, the almost simultaneous releases of new AR features in 2017/2018 from several companies in combination with the newest smart devices allow for very robust environment surface detection. Another great thing about SLAM AR is, that many SDKs to develop apps with it are offered for free. This technology can be used for a wide variety of applications like furnishing apps, home planers, games or presentation tools.
However, SLAM needs more than a camera to work. As with traditional marker tracking, the camera creates anchors around the environment on high contrast corner points. In addition it also uses the devices gyroscope, accelerometer and magnetometer to determine changes in rotation, acceleration and position. Only the newest devices are capable of taking advantage of all the sensors, which is why SLAM works either poorly or not at all on anything but the last and newest generation of phones and tablets. Google tried to took it even a step further with Project Tango, which needed special mobile devices which came with a fisheye-lensed camera in addition with infrared lights to create highly accurate environment tracking without the need for external hardware. However the project was recently shut down due to low demand and replaced with Googles recent AR technology for regular Android smart phones, AR Core.
Mixed Reality is the combination of virtual and Augmented Reality. This can be achieved by either using the camera of smartphone VR (Cardboard or GearVR) or the HTC Vive, or by use of the Microsoft Hololens, however the latter is still quite expensive and have only recently become more available. While there are mixed reality and/or smart glass solutions in development by other companies, none of them seem to be available yet. This means other than for development, using VR with regular phone / device cameras is the only viable option for smaller projects at the moment. This has some serious drawbacks. Most importantly the device camera only offers low resolution because of the tracking software and only has a small field of view, meaning you are only overlaying your digital content over a window in front of you, rather than being fully immersed in the virtual view. On top of that, running two different device SDKs is performance heavy for smartphones, which causes the noticeable camera delay to be even more prominent due to lower frames per second. Affordable mixed reality will definitely be market ready at some time in the near future, but in our opinion it is only viable for very special applications or professional enterprise solutions in its current state.
Microsoft Hololens Location based AR: Most commonly known from the Pokemon GO game, location based AR overlays content based on the devices location provided by GPS. Apart from games, tourist landmarks or mapping information could also be displayed on the device. It usually comes paired together with gyroscopic tracking, since location tracking alone would mean static content, which makes the whole point of using AR obsolete. Since the location service is part of the native platform SDK, no additional AR SDKs are necessarily required, but there are SDKs which have solutions that are ready to implement immediately.
Gyroscopic AR: Can be used for very simple apps on low-end devices, where neither positional nor target tracking are required. Otherwise not recommended, especially since SLAM does the same with adding a lot more to it. As with location based AR, it also requires no additional SDKs.
There are also other types of AR like facial tracking or shape detection, which won’t be covered in this post, as we have not worked with them yet.
Android vs iOS
Most SDKs allow for testing in the editor on PC or Mac, which accelerates development and testing by a lot, but the main platforms for AR currently are Android and iOS. Windows phones are supported by some SDKs, but their market share is still quite low compared to the other two which translates to a much smaller audience. In addition both Google and Apple have their own platform exclusive AR tools, where Microsoft focuses on Hololens in the AR market.
From all the testing we have done on a variety of devices, both platforms seem to do equally well when it comes to tracking detection and stability. The differences lie mostly on the range of supported devices, ease of development and costs.
Differences for Android:
- AR Core is free but officially only supports a small number of devices, without any supported tablets (Other SDKs support Android tablets)
- Free deployment to specific devices via side-loading (installing .apk files directly via USB).
- Cheaper deployment on the Google Play Store
- Easier to build, especially on Windows
- Larger audience, as Android is the most used mobile platform
- A very large amount of devices, which makes it more difficult to balance performance and test
Differences for iOS:
- ARKit is also free and supports all of the newest devices, as well as some medium ranged ones, also supports iPads
- More expensive deployment in iTunes store
- Side-loading only lasts for 7 days
- Private deployment to specific client devices require enterprise account (currently 300$/year)
- iOS Updates often cause difficulties for third party tools (Unity3D, Vuforia, etc.), which can result in development delays
Augmented Reality SDKs comparison
Currently, there are a lot of different AR SDKs out there, many specialize on a specific type or AR, some are free, some are expensive. We will cover only the most common ones for the AR types mentioned above.
Easy AR and AR Toolkit – both of them are free and offer basic image marker tracking and they also offer Unity3D integration. However we can’t recommend using them for anything professional, as both detection quality and stability are far inferior to professional SDKs. They are easy to use, so you can definitely play around for private projects or use them for small professional projects, but only if tracking quality is not a priority.
Apple ARKit – Apple acquired the Augmented Reality company Metaio in 2015 which, at that time, was the main competitor to Vuforia. This lead to the discontinuation of the Metaio AR SDK and the creation of ARKit. ARKit is offered for free and works on semi-modern to modern iOS devices, both phones and tablets. It offers only SLAM AR tracking, with the ability to detect horizontal and since the recent update also vertical planes in the environment. This allows for a variety of creative applications by placing any kind of content on floors, ceilings or walls. Originally only offered by Googles ARCore, ARKit now also offers an estimate of the real world light direction, which can be used to fit the lighting of augmented objects more closely to the real environment. The SDK comes for native development, as well as a Unity3D and Unreal integration.

Apple ARKit – tracking without markers Google AR Core – After project Tango has been terminated, Google announced AR Core as an answer to Apples ARKit. As ARKit only works for iOS devices, AR Core only works for Android devices. The main difference is, that AR Core supports only few and very modern phones, without official tablet support yet. Apart from that, it works pretty much the same, SLAM tracking, detection of horizontal and vertical planes, light source estimation and native, Unity3D as well as Unreal SDK.
Vuforia – The most known and popular AR SDK out there and also one of the, if not the, best SDK for Image marker and 3d target tracking. Unlike ARKit or ARCore, Vuforia offers a variety of AR types, with most of them having some form of license restrictions. Vuforia offers development licenses for free, which will add a watermark to the application. The only exception to this is Ground Plane, which is Vuforias free SLAM tracking. Cloud services are also available for 99$ per month. It is also directly implemented into the Unity3D Editor, which makes it easier if you are just starting with AR development.
- Ground Plane – SLAM with horizontal and vertical plane detection – no license required – no watermark
- Image Marker tracking – multiple image targets can be tracked simultaneously – image targets can be flat, on cubes or cylinders – 500$ per app – depending on the project, an enterprise license may be required (prize depends on the project, but in the range of several thousand $ per year per app)
- 3D scan tracking – smaller object can be scanned with Vuforias object scanner app – 500$ per app – depending on the project, an enterprise license may be required
- 3D model target – convert 3D objects into tracking targets – enterprise license required – additional VIP subscription account required to create model targets (10 are free)
Vuforia supports Android, iOS, UWP and Unity3D Editor
See Vuforia for more informationWikitude – Supports a large variety of platforms and development frameworks. It also offers free development and has multiple prizing tiers.
- Geo / location based – included in SDK Pro (2490€/year/app)
- 2D image recognition – multiple images can be tracked simultaneously – also included in SDK Pro
- SLAM – similar to ARKit and ARCore but not free – requires SDK Pro 3D (2990€/year/app) – main difference to the competing free SLAM SDKs are cross-platform support, digital eyewear support and that in general a lot more Android and iOS devices are supported, not just modern ones.
- 3D object tracking – also included in SDK Pro 3D (2990/year/app)
Wikitude also offers Cloud recognition for 4490€/year/app. The final tier is the enterprise tier which is required for smart glass deployment and enterprise apps. Prize needs to be inquired.
Supported platforms: Android, iOS, tablets, smart glasses
Supported development frameworks: Unity3D, Xamarin, Titanium, Cordova
See Wikitude for more information.Kudan – currently the main competitor to Vuforia, Kudan also offers a variety of AR types and comes with different license tiers, which, unlike other SDKs, are not limited to included features. On top of offering free development, they also offer a free AR Indie license, which allows you to publish applications with a watermark. Their production license costs 1k £/ year / app but usually covers everything for small to medium sized businesses. An Enterprise license is required, if your or your clients revenue capacity lies above 1 million £ / year. An official Unity3D plugin is also available.
- 2D image marker tracking – multiple images can be tracked simultaneously
- 3D target tracking – small and large objects are trackable
- SLAM – markerless tracking. similar to competition
Supported platforms: Android, iOS
See Kudan for more information.This concludes our basic AR overview. While this information is up to date now, the state of Augmented Reality will probably change very quickly as it is constantly receiving new advancements in both software and hardware. A lot of the things we have written about were just released up to a few months ago.
We hope to see you soon on our next post, which will continue with Jumpy Zergi production log #2.
-
Apr 07 2018 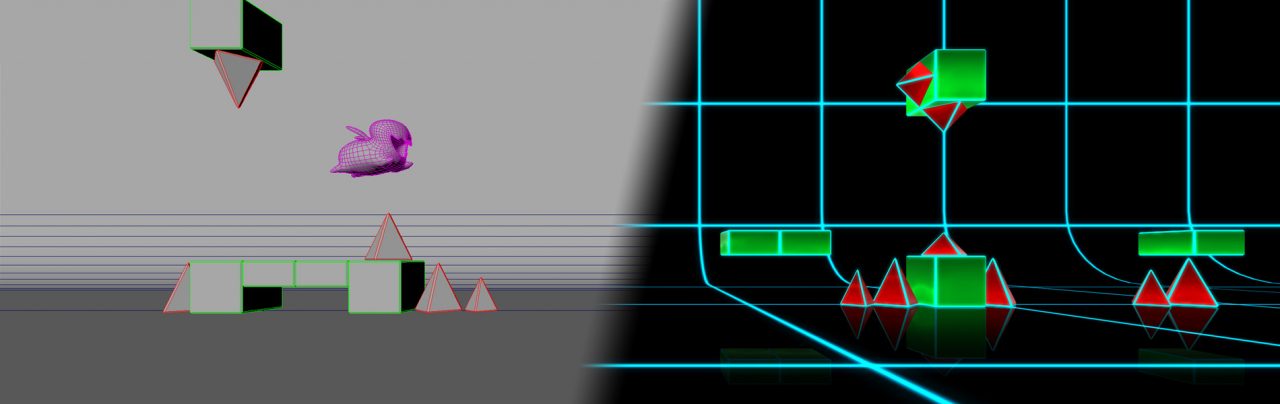
New game in the making
Jumpy Zergi production Log #1
A project which started off on an uneventful weekend is now being developed whenever there is some free time. Jumpy Zergi is a free little game, with the character based on Carbot Animations version of a Zergling, or as we like to call it, Zergi. The game is a 2D platformer with 3D graphics (or a 2.5d game), in which movement is automatic and the only input is jumping. The game is synchronized with the music and requires precise input timings to complete the level. Jumps need to be timed correctly to avoid spikes and land on platforms. The game is inspired by titles like The Impossible Game and Geometry Dash.
Currently planned game features:
- Simple and precise controls
- Catchy music and an environment that goes along with the beat
- Simple but shiny and dynamic 3D graphics and 2D level design
- Hard and challenging
- Spikes, cubes, platforms, speed and gravity switches
- Be a Zergi!
It was clear in the beginning, that the game should be simple in both gameplay and graphics, in order to release a polished product in free time only. The creation of a well polished game with minimalistic content, which can be added onto later is the final goal of this project. A 2D platformer with only one input seemed like a good idea. As usual, the project turned out to be more work than first anticipated, partly due to always wanting to improve the game.
The main objectives for Jumpy Zergi are:
- Simple enough to be created casually, but with professional polishing
- Simple but challenging gameplay, without being unfair
- Playing a level must feel natural, no clunky controls, every necessary input should go well with the music
- The entire level should be dynamic and go with the music as well
A lot of the time goes into prototyping, testing and tweaking, as well as building the level. The actual asset creation goes by rather quickly. Everything was designed around a grid, to make gameplay consistent and level design more streamlined. Once the objectives were defined, I immediately started prototyping, by implementing features in a very basic form first and with very quickly created graphic elements. The 3D model of the Zergi and its rig already existed from previous projects, however it was not animated yet.
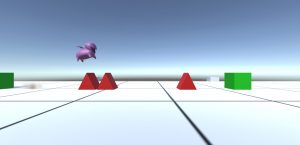
Jumpy Zergi very early prototype The game continued to look likes this for quite some time. At this point, a lot of work went into improving and tweaking the controls, adjusting hit boxes and character grounding registration. For example, the character should be able to reach a block or platform which is 2 units higher than its current position, but should not be able to hit something which is 3 units higher. The jumping mechanic is also a bit more generous by letting you jump when more than half of the character is already over the edge and in the air.
Apart from jumping over obstacles or on platforms, the game also features gravity and speed changing objects. Once they are activated, the player has to control his Zergi upside down or at a different speed than before. Those features have not been initially planned however. The level is going to be approximately 1 minute and 30 seconds long. When level blocking was in progress, it became apparent that simply jumping along for that time became monotone. With the addition of changing the speed or the down-axis the game becomes more interesting and also more challenging, without breaking the one input rule.
Progress so far:
Most of the game mechanics and elements like blocks and spikes of varying sizes, as well as the character itself are already finished. Game elements animate in and out of the scene and have a glow shader attached to them, which will later be animated. The reflection is entirely faked by using a transparent gradient and duplicated assets which are negatively scaled and placed on the opposite on the vertical axis. Speed an gravity triggers already work and have their position in the level defined. About 30% of the level has been built, while the rest of it has been blocked out with markers, to make syncing with the soundtrack easier.
Early gameplay snapshot 
Current game elements What’s next:
Currently, the level is being built, which involves more testing and tweaking than actual building. When the level is finished and balanced properly we will then take on additional decorations, animations and polishing for the main level. Most of the user interface is also still missing, as well as the main menu. A practice mode will also be added, which will allow the player to place checkpoints on the map to learn the level before trying it in one go. If there is enough time, collectibles and achievements may also be implemented into the game. Depending on feedback, the game might be updated with a second level in the future.
Keep an eye on the next Jumpy Zergi production log, which will focus on level design and how we balance the level to keep it interesting and challenging.